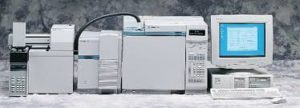
Agilent G1513 Gas Chromatograph Analyzer
Categories: Uncategorized
Agilent G1513 Gas Chromatograph Analyzer
In this procedure, we will demonstrate how to remove, inspect and reinstall the syringe cartridge of an Agilent G1513 GC Analyzer. These analyzers of usually found in many industrial laboratories and are used to analyze samples taken from chemical process.
Agilent G1513 Gas Chromatograph Analyzer
The G1513 consists of three major components: the gas chromatograph, the syringe carriage tower, and the control module.
It is vitally important to power down the control module before removing any equipment. This will help avoid any damages to any circuitry while removing the cable from the back. Another key step is to remember to remove all samples from the syringe tower. Once all equipment if clear to work on, remove the tower from the pin that holds in space and find a clear space to work.
- Unscrew the four screws in the back of the tower and remove the back. This will later be found useful when reassembling. Turn the tower back around so that the protective door can be opened.
- Check the syringe plunger to make sure it’s working properly by moving it up and down. If it moves in a jerking fashion it could just be gummed-up.
- Once the plunger is working properly remove the syringe by unscrewing the plunger screw, slide the plunger out of the way, flip the syringe wing clamp around, and lift the syringe out of the carriage assembly. The needle support assembly will snap out of place, and now we are ready to remove the syringe carriage assembly.
- Remove the two screws that hold the carriage assembly in place. Gently remove it from the tower and remove the ribbon cable that connected on the side.
- Remove the motor wires connected to the circuit board.
- Pull the motor clip back over the motor.
- Remove the motor wedge and remove motor. Once motor is removed it is recommended to check the belt. First remove the belt and look for any tears or missing teeth.
Once you have inspected and replaced all damaged parts, it is time to reassemble the carriage.
- Slide the belt back over the bottom pulley and snap the plunger carrier assembly to the side. Be sure that the plunger screw is at the bottom when doing this part.
- Fit the belt back over the gear and reconnect the motor cable. Note that on this specific model, HPG1513A, there are more pins on the circuit board then there are ports on the connector. The white dot on the face of this connector should go where there is no pin, which should leave two unused pins at the bottom. Also make sure that the cable is on the front of the assembly to avoid contact with the slide bar once it’s back in operation.
- Once it is insured the clip is seated properly, snap the motor clip back into place.
- Installing the motor wedge is vital considering it manages the tension on the belt. If too loose, the teeth will slip, which can be recognized by a buzzing sound. Vice versa if the wedge is too tight it may cause the motor might not turn properly, which may result in the needle operating in a jerking motion. Slide the wedge back in with the notch facing away from the motor. Check by sliding the plunger back and forth.
After all parts have been reassembled, you may now reinstall the syringe carriage.
- Plug the ribbon cable back in.
- Place the syringe back inside the tower making sure the slide bar gide connects and align the screw holes with the screw collars.
- After re-screwing the syringe back in place, everything must be secure.
- Before re-screwing the back cover back, inspect one last time. After doing so you may re-screw.
Finally we may begin reinstalling the needle support assembly.
- Place the top of the shaft into the top stationary guide. Make sure the collar is flat on the carriage’s surface.
- Place the needle tip into the syringe needle guide hold so that everything is aligned properly.
- Lock the syringe in place with the black wing clamp.
- Tighten the plunger screw to hold it in place.
Now that the tower is properly reassembled, place it back onto the analyzer. Reconnect the cable in the back of the control module, and it is now ready to turn on. Once powered on, the tower light should be green in the ready section. If the light isn’t coming on it means the tower is not seated properly. Make sure the tower is slid on with the tower pin and that the top of the tower pin is making contact with the limit switch that completes the circuit that helps the light come on. Lastly, test unit to make sure everything is working properly.


